Renamed the "Basic Setup" page to "Toolchain Setup" to make it clearer
that this is for setting up a development environment for local builds.

Linked to the relevant Zephyr setup documentation instead of duplicating
that information in our guide. This also switches Windows and macOS
setup to using the Zephyr SDK, which is much easier to install.

Updated the command for installing Zephyr's Python dependencies to be
OS specific, as Windows and macOS don't need the --user flag.

Updated the IDE integration page with instructions for determining the
compiler path that work with the latest version of the Zephyr SDK.
9.4 KiB
| title | sidebar_label |
|---|---|
| Toolchain Setup | Toolchain Setup |
import Tabs from '@theme/Tabs'; import TabItem from '@theme/TabItem';
export const OsTabs = (props) => (<Tabs groupId="operating-systems" defaultValue="debian" values={[ {label: 'VS Code & Docker', value: 'docker'}, {label: 'Debian/Ubuntu', value: 'debian'}, {label: 'Windows', value: 'win'}, {label: 'macOS', value: 'mac'}, {label: 'Raspberry OS', value: 'raspberryos'}, {label: 'Fedora', value: 'fedora'}, ] }>{props.children});
This guide will show you how to set up a development environment for building ZMK locally.
Install Dependencies
Click the operating system you are using. (The VS Code & Docker option can be used on any OS.)
This option use the same Docker image which is used by the GitHub action for local development. Beyond the benefits of dev/prod parity, this approach is also the easiest to set up. No toolchain or dependencies are necessary when using Docker; the container image you'll be using already has the toolchain installed and set up to use.
- Install Docker Desktop for your operating system.
- Install Visual Studio Code
- Install the Remote - Containers extension
:::info
The docker container already includes west. Skip past the following section to Get Source Code.
:::
Open Zephyr's Getting Started Guide and follow the instructions under these sections:
Return to this guide once you are finished with each section.
Open Zephyr's Getting Started Guide and follow the instructions under these sections:
Return to this guide once you are finished with each section.
dfu-util is required to flash devices that use DFU, but there is currently no maintained package for it on Chocolatey. QMK Toolbox contains a working version of it though.
Open Zephyr's Getting Started Guide and follow the instructions under these sections:
Return to this guide once you are finished with each section.
Install Base Dependencies
Open Zephyr's Getting Started Guide and follow the instructions for Ubuntu under these sections:
Return to this guide once you are finished with each section.
Install Cross-Compile Toolchain
Because Raspberry OS runs on the same architecture (but different ABI) as ARM keyboard MCUs, the operating system's installed cross compilers can be used to target the different ABI. Building for non-ARM MCUs has not been tested.
First, the cross compiler should be installed:
sudo apt install gcc-arm-none-eabi
Next, we'll configure Zephyr with some environment variables needed to find the cross compiler. Create a file named ~/.zephyrrc if it doesn't exist, and add these lines to it:
export ZEPHYR_TOOLCHAIN_VARIANT=cross-compile
export CROSS_COMPILE=/usr/bin/arm-none-eabi-
Follow Zephyr's Install Linux Host Dependencies documentation for Fedora.
Install West
west is the Zephyr® Project's meta-tool used to configure and build Zephyr OS applications.
West can be installed by using the pip python package manager. The Zephyr™ instructions are summarized here:
<Tabs defaultValue="linux" groupId="python-os" values={[ {label: 'Linux', value: 'linux'}, {label: 'Windows', value: 'win'}, {label: 'macOS', value: 'mac'}, ]}>
Install west:
pip3 install --user -U west
Verify that west is installed:
west --version
This should print a message like "West version: v0.14.0". If it prints an error instead, make sure ~/.local/bin is on your PATH environment variable. You can add it with these commands:
echo 'export PATH=~/.local/bin:"$PATH"' >> ~/.bashrc
source ~/.bashrc
Install west:
pip3 install -U west
Verify that west is installed:
west --version
This should print a message like "West version: v0.14.0". If it prints an error instead, make sure that the Python scripts directory is on your PATH environment variable. You can add it by opening a PowerShell window and running the following commands:
$Scripts = python -c "import sysconfig; print(sysconfig.get_path('scripts'))"
$Path = [Environment]::GetEnvironmentVariable('PATH', 'User')
[Environment]::SetEnvironmentVariable('PATH', "$Path;$Scripts", 'User')
$env:PATH += ";$Scripts"
Install west:
pip3 install -U west
Get Source Code
Next, you'll need to clone the ZMK source repository if you haven't already. Navigate to the folder you would like to place your zmk directory in and run the following command:
git clone https://github.com/zmkfirmware/zmk.git
Initialize & Update Zephyr Workspace
Since ZMK is built as a Zephyr™ application, the next step is
to use west to initialize and update your workspace. The ZMK
Zephyr™ application is in the app/ source directory:
Step into the repository
cd zmk
cd zmk
cd zmk
cd zmk
cd zmk
Open the zmk checkout folder in VS Code. The repository includes a configuration for containerized development, so an alert will pop up:
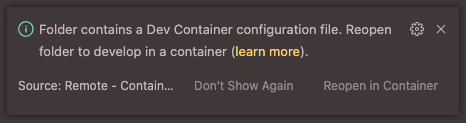
Click Reopen in Container in order to reopen the VS Code with the running container.
The first time you do this on your machine, it will pull the docker image down from the registry and build the container. Subsequent launches are much faster!
:::caution All subsequent steps must be performed from the VS Code terminal inside the container. :::
Initialize the Application
west init -l app/
Update to Fetch Modules
west update
:::tip This step pulls down quite a bit of tooling. Go grab a cup of coffee, it can take 10-15 minutes even on a good internet connection! :::
:::info If you're using Docker, you're done with setup! You must restart the container at this point. The easiest way to do so is to close the VS Code window, verify that the container has stopped in Docker Dashboard, and reopen the container with VS Code.
Once your container is restarted, proceed to Building and Flashing. :::
Export Zephyr CMake package
This allows CMake to load the code needed to build ZMK.
west zephyr-export
Install Zephyr Python Dependencies
Some additional Python dependencies are listed in Zephyr's scripts/requirements.txt file.
<Tabs defaultValue="linux" groupId="python-os" values={[ {label: 'Linux', value: 'linux'}, {label: 'Windows', value: 'win'}, {label: 'macOS', value: 'mac'}, ]}>
pip3 install --user -r zephyr/scripts/requirements.txt
pip3 install -r zephyr/scripts/requirements.txt
pip3 install -r zephyr/scripts/requirements.txt